Have you ever experienced one of these situations?
- The color looked perfect during production, but the customer complained after receiving the finished product.
- A designer approved the color, but it appeared completely different on the production line.
- Two samples matched under one light source but looked different under another.
If so, the problem may not be the color itself—it may be the lighting conditions under which the color was evaluated.
Color is not an inherent property of an object. Instead, it is the result of an interaction between three elements:
- The light source.
- The object.
- The observer.
Change one of these variables, and the perceived color can change dramatically.
That’s why visual color evaluation should never rely on office lighting, daylight through a window or factory lighting. Instead, manufacturers use a light booth (also called a color assessment cabinet or color matching light box) to create standardized viewing conditions.
A light booth provides controlled illumination, neutral surroundings and repeatable viewing conditions so everyone—from designers and production teams to suppliers and customers—is evaluating color in the same environment.
Industries including textiles, plastics, paints and coatings, cosmetics, packaging, automotive and printing all rely on light booths to improve color consistency and reduce costly color disputes.
Related reading:
What Is a Light Booth?
A light booth is an enclosed viewing environment designed specifically for visual color assessment.
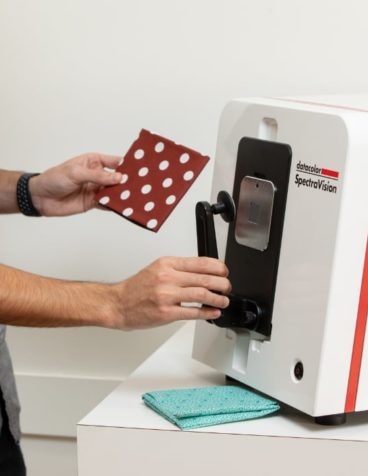
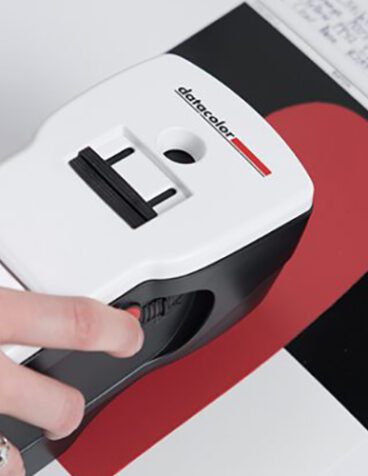
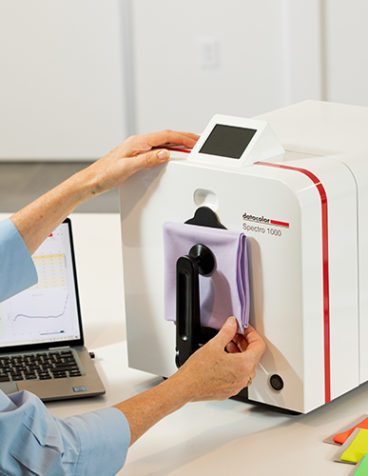
Unlike a spectrophotometer, which measures color numerically, a light booth standardizes the conditions under which people evaluate color visually.
The booth provides:
- Controlled and repeatable light sources.
- Neutral gray interior surfaces.
- Consistent viewing geometry.
- Protection from surrounding ambient light.
- A standardized environment for comparing samples.
This allows quality control teams to compare:
- Master standards.
- Lab dips.
- Production batches.
- Finished goods.
- Supplier samples.
Because every evaluation takes place under identical conditions, visual decisions become much more consistent across departments, production sites and global supply chains.
Light Booth vs. Spectrophotometer
A common misconception is that a light booth measures color.
It does not.
A light booth standardizes visual evaluation, while a spectrophotometer provides objective numerical color measurements.
| Tool |
Purpose |
Best Used For |
| Light Booth |
Visual color assessment |
Appearance evaluation under controlled lighting |
| Spectrophotometer |
Objective color measurement |
Color matching, formulation and quality control |
The strongest color quality workflows combine both tools.
Why Colors Look Different Under Different Light Sources
Have you ever purchased clothing that looked black in the store but appeared dark blue outside?
This is a classic example of how lighting influences color perception.
Different light sources emit different spectral distributions.
Daylight (D65), fluorescent office lighting, warm incandescent bulbs and modern LEDs all contain different combinations of wavelengths. Because materials reflect these wavelengths differently, the same object can appear to change color depending on its environment.
This explains why:
- A product passes inspection in the factory.
- The customer rejects it under store lighting.
- Designers and manufacturers disagree about color.
- Suppliers report inconsistent visual results.
Using a standardized light booth eliminates much of this variability by ensuring every evaluation takes place under agreed lighting conditions.
Metamerism and Flare
Two important phenomena become much easier to detect when using a controlled viewing environment.
Metamerism
Metamerism occurs when two samples appear identical under one light source but different under another.
This happens because different pigment combinations can produce similar colors under one illuminant while reflecting light differently under another.
Metamerism is one of the leading causes of color disputes between suppliers and customers.
Learn more in What Is Metamerism?.
Flare
Flare is slightly different.
Rather than comparing two different materials, flare describes how a single material changes appearance when viewed under different lighting conditions.
Understanding both phenomena helps manufacturers choose appropriate light sources for product approval and avoid unexpected customer complaints.
Using multiple standardized illuminants inside a light booth makes these effects much easier to identify before products leave the factory.
Which Light Sources Should You Use?
A light booth is only effective when it uses the correct light sources for your industry, customer requirements and final viewing environment.
Different illuminants simulate different real-world conditions. Evaluating a product under multiple standardized light sources helps identify potential metamerism before products reach customers.
The goal is not to test under every possible lighting condition, but to evaluate under the light sources that matter most for your application.
| Light Source |
Typical Application |
| D65 |
Standard daylight evaluation for many industrial applications. |
| D50 |
Printing, photography and graphic arts. |
| A (Incandescent) |
Warm indoor and residential lighting. |
| TL84 / CWF |
Retail stores, offices and commercial environments. |
| LED |
Modern retail, office and consumer lighting. |
| UV |
Materials containing optical brighteners or fluorescent pigments. |
Using multiple illuminants helps ensure that products maintain an acceptable appearance throughout their entire lifecycle—from manufacturing to retail and final customer use.
How to Set Up a Light Booth Correctly
Even the highest-quality light booth cannot deliver reliable results if it is installed or used incorrectly.
Creating a controlled viewing environment requires attention to both the surroundings and the evaluation procedure.
Control the Surrounding Environment
External light is one of the biggest threats to accurate visual color assessment.
The light booth should be placed in an area where outside light cannot influence the evaluation.
Best practices include:
- Avoid windows or direct sunlight.
- Minimize reflections from walls or nearby equipment.
- Use neutral gray surroundings whenever possible.
- Keep the viewing area free from unnecessary objects.
- Do not use the booth for storage.
Brightly colored clothing can also influence visual perception because colors may reflect onto the samples inside the booth.
Whenever possible, evaluators should avoid wearing highly saturated colors during critical color assessments.
Common Mistake
Many companies install an expensive light booth but position it near large windows or beneath uncontrolled ceiling lighting.
This defeats the purpose of creating a standardized viewing environment.
Viewing Geometry
The viewing angle has a direct influence on perceived color, gloss and surface appearance.
International color standards primarily use two viewing geometries.
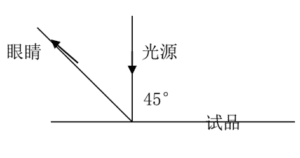
0° / 45° Viewing Geometry
In this arrangement, the light source illuminates the sample vertically (0°) while the observer views it from a 45° angle.
This setup helps minimize direct reflections and provides consistent visual assessment for many materials.
45° / 0° Viewing Geometry
In this configuration, the light source illuminates the sample at a 45° angle while the observer views the specimen vertically.
This arrangement is commonly supported using a dedicated viewing table and is particularly useful for many industrial color evaluation workflows.
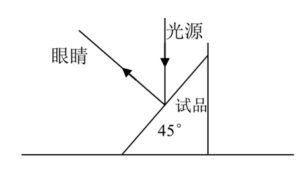
For glossy, textured, metallic or pearlescent materials, maintaining a consistent viewing angle is especially important because small angle changes can significantly affect perceived color and gloss.
How to Position Samples Correctly
Correct sample placement is just as important as selecting the right light source.
Whenever comparing two or more samples:
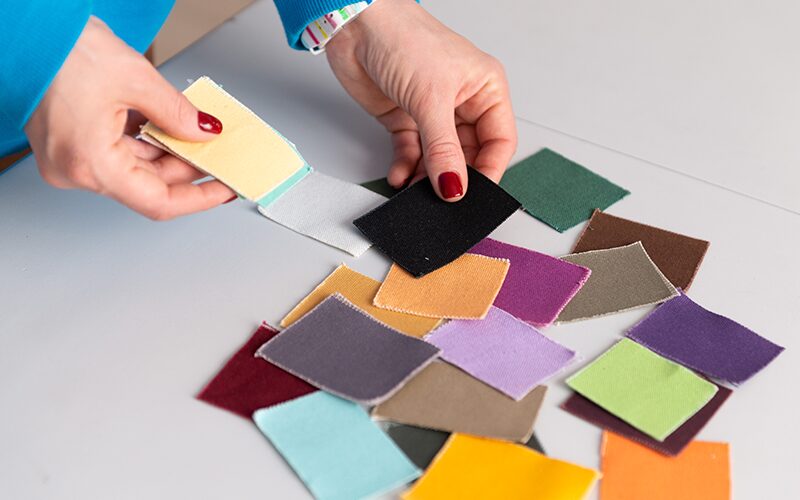
- Place samples side by side.
- Position them in the center of the viewing area.
- Avoid overlapping samples.
- Keep orientation consistent.
- Ensure all samples receive equal illumination.
Overlapping samples can create unwanted shadows, edge effects and visual contrast that make color differences appear larger than they actually are.
For directional materials such as textiles, brushed metals, wood grain or plastics with visible flow patterns, always maintain the same orientation during comparison.
A Practical Workflow for Visual Color Evaluation
Standardizing the evaluation process helps improve consistency across operators, production facilities and suppliers.
- Select the approved master standard.
- Confirm the correct light source.
- Prepare all samples consistently.
- Compare samples under the primary illuminant.
- Switch to secondary illuminants to detect metamerism.
- Document the evaluation results.
- Review instrumental measurement data if necessary.
Combining visual evaluation with objective spectrophotometer measurements creates a far more reliable color quality control workflow than relying on either method alone.
Related reading:
Light Booth Care and Maintenance
A light booth is only as reliable as its condition.
Even the best visual evaluation equipment can produce inconsistent results if the interior becomes dirty, the light sources deteriorate or the booth is not maintained properly.
Routine maintenance helps ensure that every color assessment is performed under the same controlled conditions, reducing subjective decisions and improving confidence in production approvals.
Daily Care
Daily maintenance requires only a few minutes but has a significant impact on color consistency.
Quality teams should ensure that the light booth remains:
- Clean and free from dust.
- Free of unnecessary samples or objects.
- Protected from external light.
- Equipped with the correct light source for the evaluation.
- Free from stains or damage to the neutral gray interior.
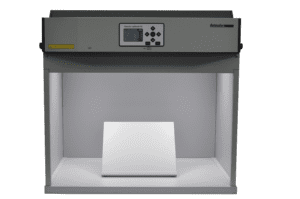
A clean environment helps eliminate distractions and prevents unintended reflections that may influence visual perception.
Periodic Verification
Over time, lamps lose intensity, color temperature may drift and interior surfaces can become damaged or discolored.
Regular verification ensures that the light booth continues to meet quality requirements.
Recommended inspections include:
- Light source performance.
- Lamp operating hours.
- Illumination uniformity.
- Light distribution throughout the booth.
- Condition of neutral gray interior panels.
- Surface damage, scratches or stains.
- Consistency between multiple light booths.
Organizations operating multiple production sites should periodically compare all light booths to ensure visual evaluations remain consistent worldwide.
Why Lamp Replacement Matters
Many companies continue using lamps long after they have exceeded their recommended service life.
Although the lamps still appear bright, their spectral output may have changed enough to influence color perception.
This gradual change is difficult to notice from day to day but can eventually lead to inconsistent approvals and customer complaints.
Following the manufacturer’s replacement schedule helps maintain reliable viewing conditions throughout the life of the light booth.
Calibration and Verification
Calibration is essential for ensuring that a light booth continues to provide standardized viewing conditions.
Unlike routine cleaning, calibration verifies that the booth still performs according to industry requirements.
A complete verification typically includes:
- Measuring each light source with a spectroradiometer or spectrometer.
- Confirming the correct correlated color temperature (CCT).
- Verifying illuminance levels.
- Checking light distribution across the viewing area.
- Inspecting the condition of the booth interior.
- Comparing results against applicable standards.
These inspections help identify problems before they affect production decisions.
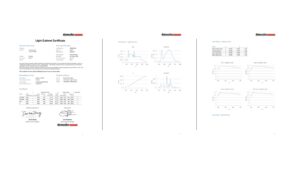
What Should a Standard Light Booth Test Report Include?
Documenting light booth performance provides traceability for audits, supplier communication and internal quality management.
A comprehensive test report should include the following information:
| Inspection Item |
Purpose |
| Inspection date |
Provides maintenance history and traceability. |
| Testing engineer |
Identifies who performed the inspection. |
| Light booth model & serial number |
Identifies the equipment. |
| Measurement equipment |
Documents the instruments used during verification. |
| Factory or laboratory location |
Supports multi-site quality management. |
| Interior condition |
Confirms that surfaces remain neutral and undamaged. |
| Light source performance |
Verifies illuminance, color temperature and compliance. |
A standardized report makes it easier to compare results over time and demonstrate compliance during customer or regulatory audits.
Surface Condition
The neutral gray interior is designed to eliminate unwanted color reflections.
If the paint becomes stained, chipped or discolored, it may influence visual assessments.
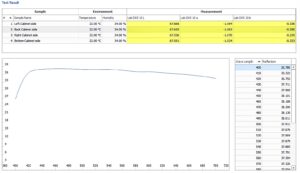
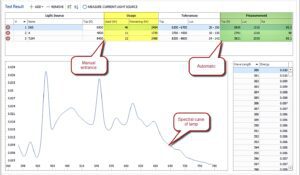
Light Source Performance
Each installed light source should be tested to verify:
- Color temperature.
- Illuminance.
- Light distribution.
- Overall compliance with specifications.
Documentation
A complete report provides quality teams with confidence that the viewing environment remains suitable for critical color evaluations.
Common Mistakes When Using a Light Booth
Many color inconsistencies result from incorrect use rather than equipment failure.
The most common mistakes include:
- Using the light booth as a storage cabinet.
- Allowing daylight or office lighting to enter the booth.
- Comparing overlapping samples instead of placing them side by side.
- Failing to replace aging lamps on schedule.
- Ignoring the specified viewing angle.
- Evaluating samples while wearing brightly colored clothing.
- Comparing samples that have not been conditioned consistently.
A standardized operating procedure helps eliminate these errors and improves consistency between operators, production sites and suppliers.
Related reading:
How to Choose the Right Light Booth
Not every light booth is designed for the same application. The right solution depends on the materials you evaluate, your quality control process and the environments in which your products will ultimately be viewed.
Before investing in a light booth, consider both your current workflow and future quality requirements. Choosing the right system helps reduce subjectivity, improve communication with suppliers and ensure long-term consistency across production sites.
Key Selection Criteria
When comparing different light booth models, consider the following factors:
- Sample size – Will you evaluate small laboratory samples, molded plastic parts, painted panels, textiles or complete finished products?
- Required light sources – Which illuminants are specified by your customers or industry standards (D65, D50, TL84, CWF, A, UV or LED)?
- Viewing area – Ensure the booth provides sufficient space for your largest samples.
- Compliance requirements – Verify compatibility with standards such as ASTM D1729 or internal quality procedures.
- Multi-site consistency – If multiple facilities or suppliers use light booths, selecting identical configurations improves consistency.
- Maintenance support – Choose equipment with lamp timers, service support and calibration options.
Selecting the appropriate light booth ensures that visual evaluations remain repeatable throughout the product lifecycle.
Standard Compliance
Many organizations specify internationally recognized standards within their quality management systems.
One of the most widely referenced standards is ASTM D1729, which provides guidance for visual evaluation of color differences under controlled viewing conditions.
Following standardized procedures helps organizations:
- Reduce subjective color decisions.
- Improve supplier communication.
- Support customer audits.
- Create repeatable quality control processes.
- Maintain consistency across multiple production facilities.
Advanced Light Booth Features
As manufacturing processes become increasingly global, many companies require more advanced visual evaluation capabilities.
Adjustable Illumination
Some applications require greater flexibility than traditional fixed lighting systems can provide.
Datacolor’s PS and ES series light booths offer adjustable illumination options that support different materials and quality control requirements.
This flexibility is particularly valuable for:
- Automotive coatings.
- Plastic components.
- Large packaging samples.
- Textiles.
- Appearance-critical consumer products.
LED Technology
Many organizations are transitioning from fluorescent lamps to LED technology.
Modern LED systems offer several advantages, including:
- Improved stability.
- Longer operating life.
- Reduced maintenance.
- Lower energy consumption.
- More consistent light output.
As LED lighting becomes increasingly common in retail stores, offices and homes, evaluating products under standardized LED illuminants is becoming increasingly important.
Related reading:
Where a Light Booth Fits Within a Complete Color Management Workflow
A light booth is only one component of a complete color quality control program.
The strongest workflows combine three complementary technologies.
| Tool |
Primary Role |
| Light Booth |
Standardized visual evaluation. |
| Spectrophotometer |
Objective numerical color measurement. |
| Color Quality Software |
Tolerance management, documentation and reporting. |
Together, these tools help organizations:
- Reduce color-related customer complaints.
- Minimize production rework.
- Improve communication with suppliers.
- Speed up approval cycles.
- Create objective, traceable quality decisions.
- Maintain consistent product appearance across markets.
Instead of relying solely on visual judgment, manufacturers can combine objective measurements with standardized visual assessment to make faster and more reliable color decisions.
Frequently Asked Questions
What is a light booth used for?
A light booth provides a standardized environment for visually comparing color samples under controlled lighting conditions. It helps determine whether production samples match approved standards.
Does a light booth measure color?
No. A light booth controls the viewing environment for visual evaluation. Numerical color measurements are performed using a spectrophotometer.
Why do colors match in one light source but not another?
This is typically caused by metamerism, where different material formulations reflect light differently under various illuminants.
Which light source should I use?
The appropriate light source depends on customer specifications, industry standards and the final viewing environment. Common choices include D65, D50, TL84, CWF, LED, A and UV.
How often should a light booth be calibrated?
Calibration and verification intervals depend on your quality management system, equipment usage and manufacturer recommendations. Regular inspections help maintain consistent viewing conditions.
When should lamps be replaced?
Lamps should be replaced according to the manufacturer’s specified operating hours, even if they still appear bright, because their spectral output changes over time.
Can one light booth be used for multiple industries?
Yes. Many light booths support multiple standardized light sources, making them suitable for plastics, paints, coatings, textiles, cosmetics, packaging, automotive and many other industries.
Why shouldn’t I store samples inside a light booth?
Stored materials collect dust, may discolor interior surfaces and can interfere with the standardized viewing environment required for accurate visual assessment.
What standards apply to light booth evaluations?
Many organizations follow standards such as ASTM D1729 along with customer-specific quality procedures and internal operating instructions.
Why should visual evaluation be combined with spectrophotometer measurements?
Visual evaluation reflects how customers perceive a product, while spectrophotometers provide objective color data. Combining both methods creates a more reliable and repeatable color quality control process.
Improve Visual Color Evaluation with Datacolor Light Booths
Consistent color starts with consistent viewing conditions. Datacolor light booths provide standardized illumination, controlled viewing environments and reliable visual evaluation tools that help manufacturers reduce subjective color decisions, detect metamerism and improve product consistency across global supply chains.
Connect with a Color Expert

 Want to Get Color Right?