By Ken Butts
This article is based on our webinar Evaluating Fluorescent White Materials, part of Datacolor’s Digital Color Management Fundamentals series.
Have you ever wondered why some white fabrics seem to glow under a blacklight, or why one white shirt appears noticeably brighter than another even though both are technically “white”?
The answer lies in fluorescent white materials and the optical brightening agents (OBAs) used during manufacturing.
Unlike ordinary white materials, fluorescent whites actively interact with ultraviolet (UV) light. As a result, their appearance changes depending on the amount of UV energy present in the viewing environment.
For manufacturers, brands, laboratories and suppliers, this creates a unique color management challenge.
A textile sample that appears perfectly acceptable in one location may look noticeably different somewhere else simply because the lighting conditions or measuring equipment contain different amounts of ultraviolet light.
To achieve consistent approvals, organizations must combine standardized visual evaluation with properly UV-calibrated spectrophotometers.
This guide explains:
- What fluorescent white materials are
- How optical brightening agents work
- Why lighting conditions matter
- How to accurately measure fluorescent whites
- How UV calibration improves measurement consistency
- Best practices for repeatable color approval programs
What Is a Fluorescent White Material?
A fluorescent white material contains Optical Brightening Agents (OBAs), also known as Fluorescent Whitening Agents (FWAs).
These special chemicals absorb invisible ultraviolet (UV) radiation and re-emit it as visible blue light.
The additional blue light offsets the natural yellow appearance found in many materials, causing them to appear:
- Brighter
- Cleaner
- Whiter
- More vibrant
Although consumers simply notice a brighter white garment, color professionals recognize that the appearance depends heavily on the amount of ultraviolet light present during evaluation.
OBAs are commonly used in:
- Textiles
- Apparel
- Paper products
- Nonwoven materials
- Consumer packaging
- Home furnishings
Related reading:
Why Do Some White Materials Look Whiter Than Others?
Many natural materials—particularly cotton—retain a slightly yellow appearance even after bleaching.
Without additional treatment, these materials rarely achieve the crisp, bright white appearance consumers expect.
Optical brightening agents solve this problem by changing how light interacts with the material.
Without Optical Brightening Agents
Untreated white materials absorb some blue wavelengths while reflecting relatively more yellow light.
The result is a dull or slightly yellow appearance.
With Optical Brightening Agents
OBAs absorb ultraviolet light that humans cannot see and convert it into visible blue light.
This additional blue energy visually compensates for yellow tones, making the material appear significantly brighter and cleaner.
| Material Type |
Typical Appearance |
| Untreated white material |
Slightly yellow or dull |
| OBA-treated material |
Brighter, cleaner and whiter |
This effect explains why two fabrics that are technically identical can appear dramatically different under various lighting conditions.
Why Lighting Matters When Evaluating Fluorescent Whites
The appearance of fluorescent white materials depends directly on the amount of ultraviolet energy available in the light source.
Different lighting environments contain different amounts of UV radiation.
For example:
- Natural daylight contains significant UV energy.
- Fluorescent lighting contains less UV.
- LED lighting varies depending on the fixture.
- Incandescent lighting contains relatively little UV energy.
Because optical brightening agents require UV energy to function, the same material can appear noticeably different under each light source.
A sample approved under fluorescent lighting may therefore appear considerably brighter when viewed outdoors in natural daylight.
This is one of the primary reasons why fluorescent white materials are more challenging to evaluate than standard colors.
Related reading:
Evaluating Fluorescent Whites in a Light Booth
Visual evaluation remains an essential part of many color approval workflows.
However, when evaluating fluorescent white materials, consistency depends on using a daylight source with carefully controlled ultraviolet content.
To improve repeatability, organizations should follow these best practices:
- Use a standardized light booth.
- Verify the UV content of the daylight source.
- Evaluate all samples under identical viewing conditions.
- Ensure suppliers and laboratories follow the same procedures.
Without standardized lighting, subjective evaluations can easily lead to approval delays, supplier disputes and unnecessary rework.
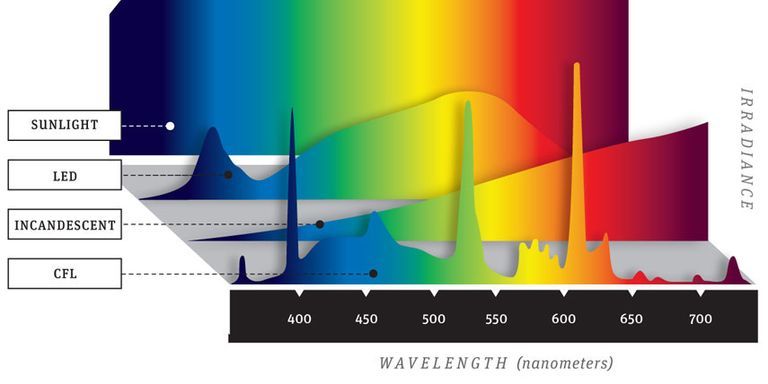
Image source: Popular Mechanics
Why Spectrophotometers Are Essential for Fluorescent Whites
Although visual evaluation remains an important part of many quality control programs, it is inherently subjective. Different observers may perceive the same fluorescent white material differently depending on lighting conditions, viewing angles and individual color perception.
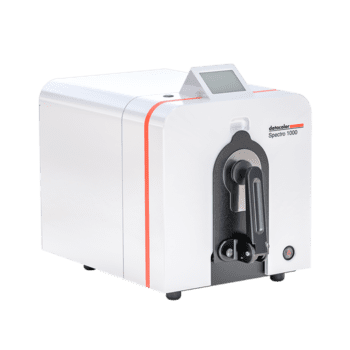
For this reason, most manufacturers rely on spectrophotometers to objectively measure fluorescent white materials.
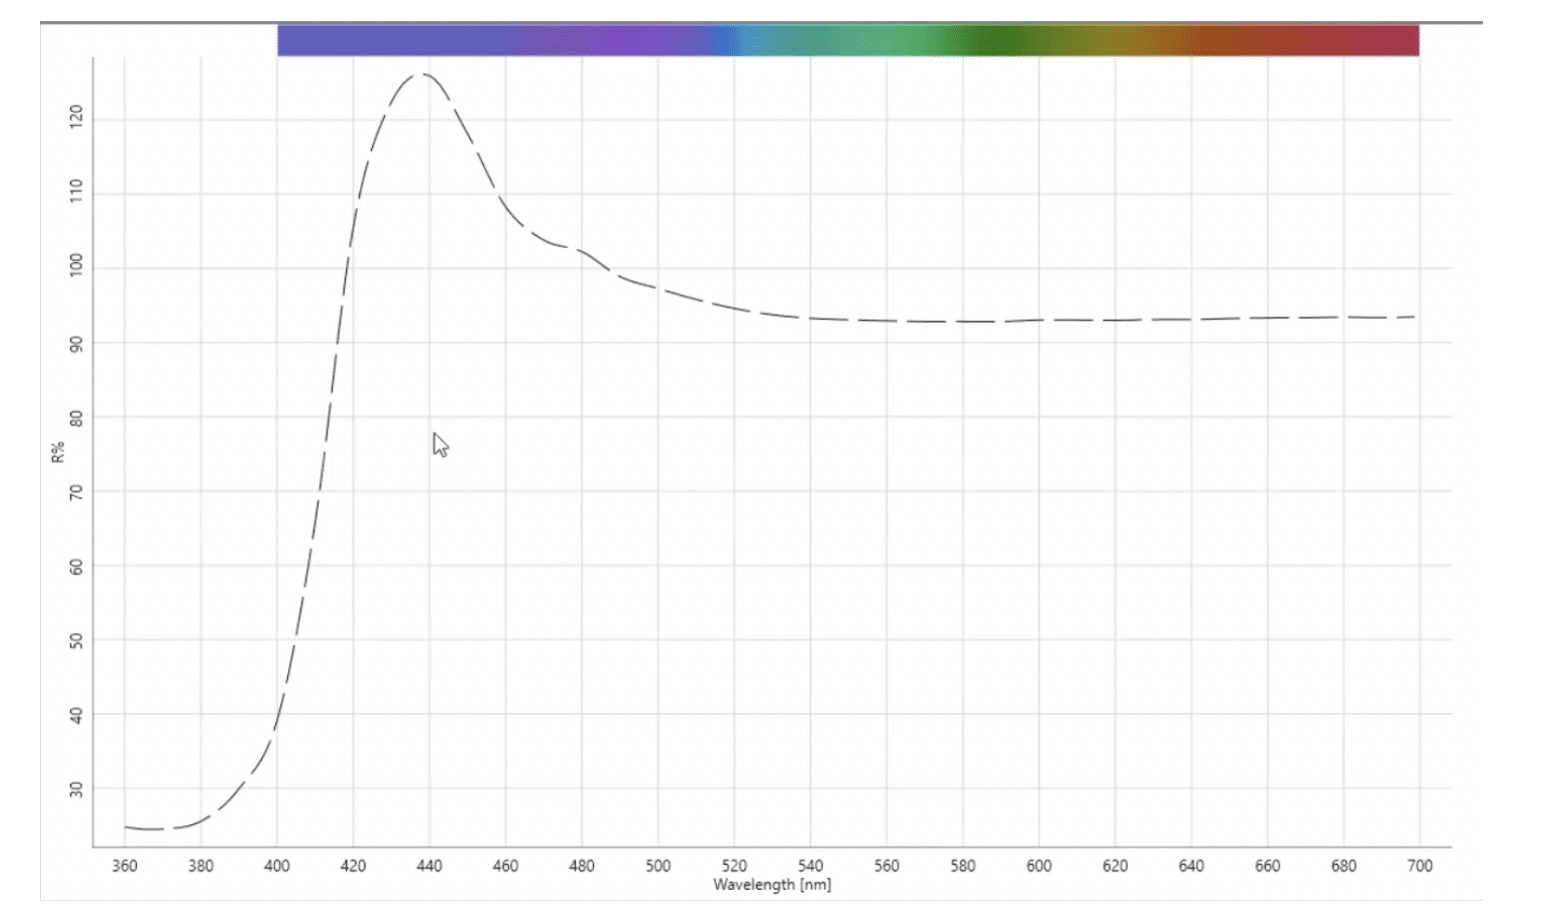
A spectrophotometer measures the amount of light reflected from a material across the visible spectrum, typically between 400 and 700 nanometers (nm).
For fluorescent white materials, however, something unique occurs.
Because optical brightening agents convert invisible UV energy into visible blue light, the reflected blue energy can exceed the amount of light originally striking the sample.
As a result, reflectance values in the blue region of the spectrum may exceed 100% reflectance.
This additional reflected blue light is exactly what gives fluorescent white materials their brighter appearance.
Related reading:
Why UV Calibration Is Critical
Simply measuring a fluorescent white material is not enough.
The spectrophotometer itself must also be properly calibrated for ultraviolet energy.
Most high-end benchtop spectrophotometers use a xenon flash lamp as their illumination source. Xenon lamps contain significantly more ultraviolet energy than natural daylight.
If that additional UV energy is not controlled, the instrument will generate more fluorescence than would normally occur under standard viewing conditions.
The result is a measurement that suggests the sample is considerably whiter than it actually appears to the human eye.
Without proper UV calibration, organizations may experience:
- Inaccurate whiteness measurements
- Poor agreement between instruments
- Supplier disputes
- Inconsistent pass/fail decisions
- Reduced confidence in color data
The Solution: UV Calibration
The industry-standard solution is to calibrate the spectrophotometer using a certified ultraviolet reference material.
The most commonly used standard is the AATCC Textile UV Calibration Standard (TUVCS).
This reference textile:
- contains a precisely controlled fluorescent white material;
- has traceable reference measurements from AATCC;
- allows the UV content of the instrument to be adjusted accurately;
- improves measurement repeatability across different instruments.
UV calibration is performed according to:
AATCC Evaluation Procedure 11 – Spectrophotometer UV Energy Calibration Procedure for Optically Brightened Textiles
Following this procedure helps ensure that every instrument within the supply chain produces comparable results.
Related reading: Why Should You Care About Inter-Instrument Agreement?
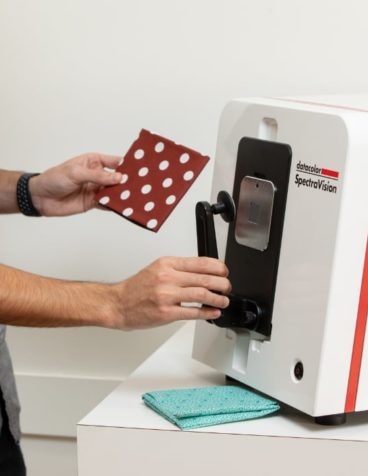
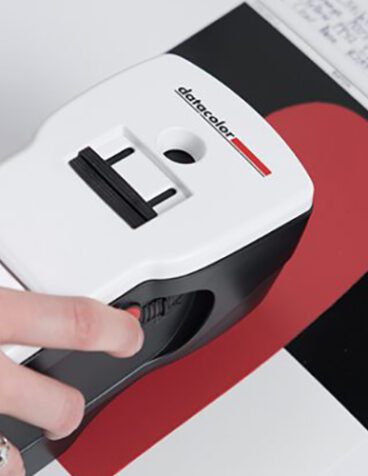
Best Practices for Measuring Fluorescent Whites
When measuring fluorescent white materials on sphere spectrophotometers, following standardized procedures is essential.
Datacolor recommends:
- Using the SCI (Specular Component Included) measurement mode.
- Selecting the Large Area View (LAV) aperture whenever appropriate.
- Ensuring UV calibration has been completed before measuring production samples.
- Using consistent measurement conditions throughout the supply chain.
These practices significantly improve measurement reproducibility while reducing variation between laboratories and suppliers.
Handling the TUVCS Calibration Standard
The calibration standard itself requires careful handling.
Even a properly calibrated instrument can produce unreliable results if the reference standard becomes contaminated or deteriorates over time.
To maximize accuracy:
- Handle the textile standard only by its edges.
- Keep the measurement surface clean.
- Store it inside the original BHT-free storage bag.
- Never continue using an expired calibration standard.
- Inspect the material regularly for discoloration or contamination.
An expired or damaged calibration standard can compromise every measurement performed afterwards.
Related reading: How to Store, Use and Clean Spectrophotometer Calibration Standards.
What Is a Whiteness Index?
Raw spectral data alone does not indicate whether a fluorescent white sample is acceptable.
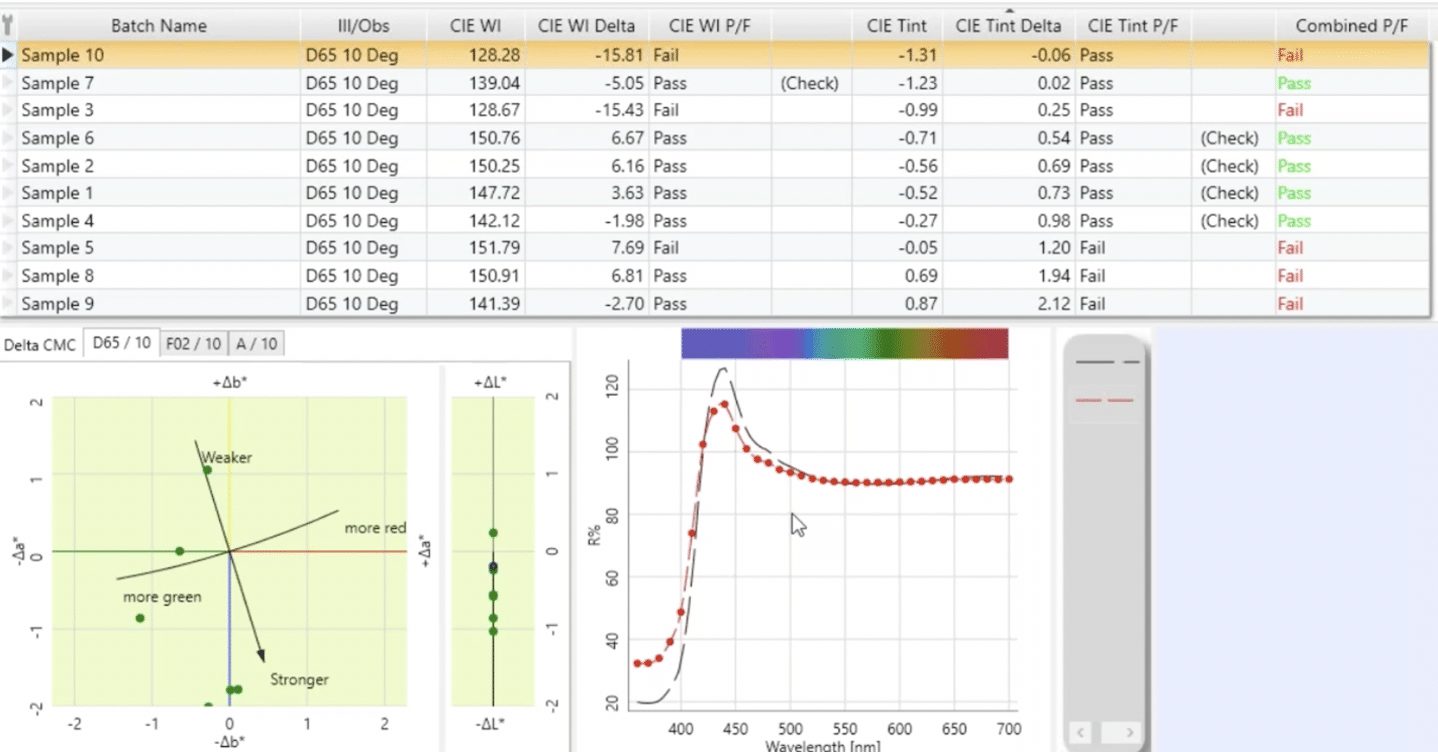
Instead, manufacturers typically use a Whiteness Index (WI), which converts reflectance data into a single numerical value representing the perceived whiteness of a material.
Several whiteness formulas are used throughout industry, with the most common being:
- CIE Whiteness Index
- Ganz-Griesser Whiteness Index
| Whiteness Index |
Typical Appearance |
| Higher value |
Brighter, cleaner white appearance |
| Lower value |
More yellow or dull appearance |
Most whiteness calculations also include a tint value, indicating whether the white appears slightly reddish, greenish or bluish.
Together, whiteness and tint provide a much more complete picture of how a fluorescent white material will appear in practice.
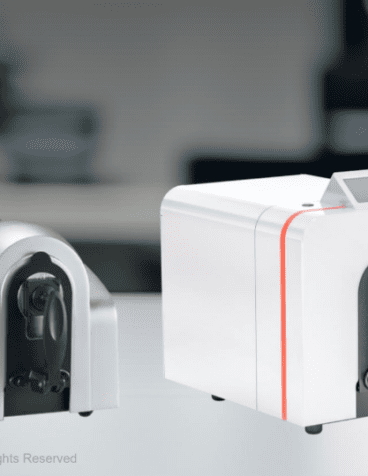
How Instrument Age Can Affect Fluorescent White Measurements
Even when a spectrophotometer has been properly UV calibrated, measurement accuracy can gradually change as the instrument ages.
This is particularly important when evaluating fluorescent white materials, as their appearance is highly sensitive to ultraviolet light.
Several components naturally change over time, including:
- The xenon flash lamp
- The UV filter
- The integrating sphere coating
- Internal optical components
As these components age, the amount of usable ultraviolet energy produced by the instrument decreases. To compensate, the UV filter must gradually open further to allow more UV energy to reach the sample.
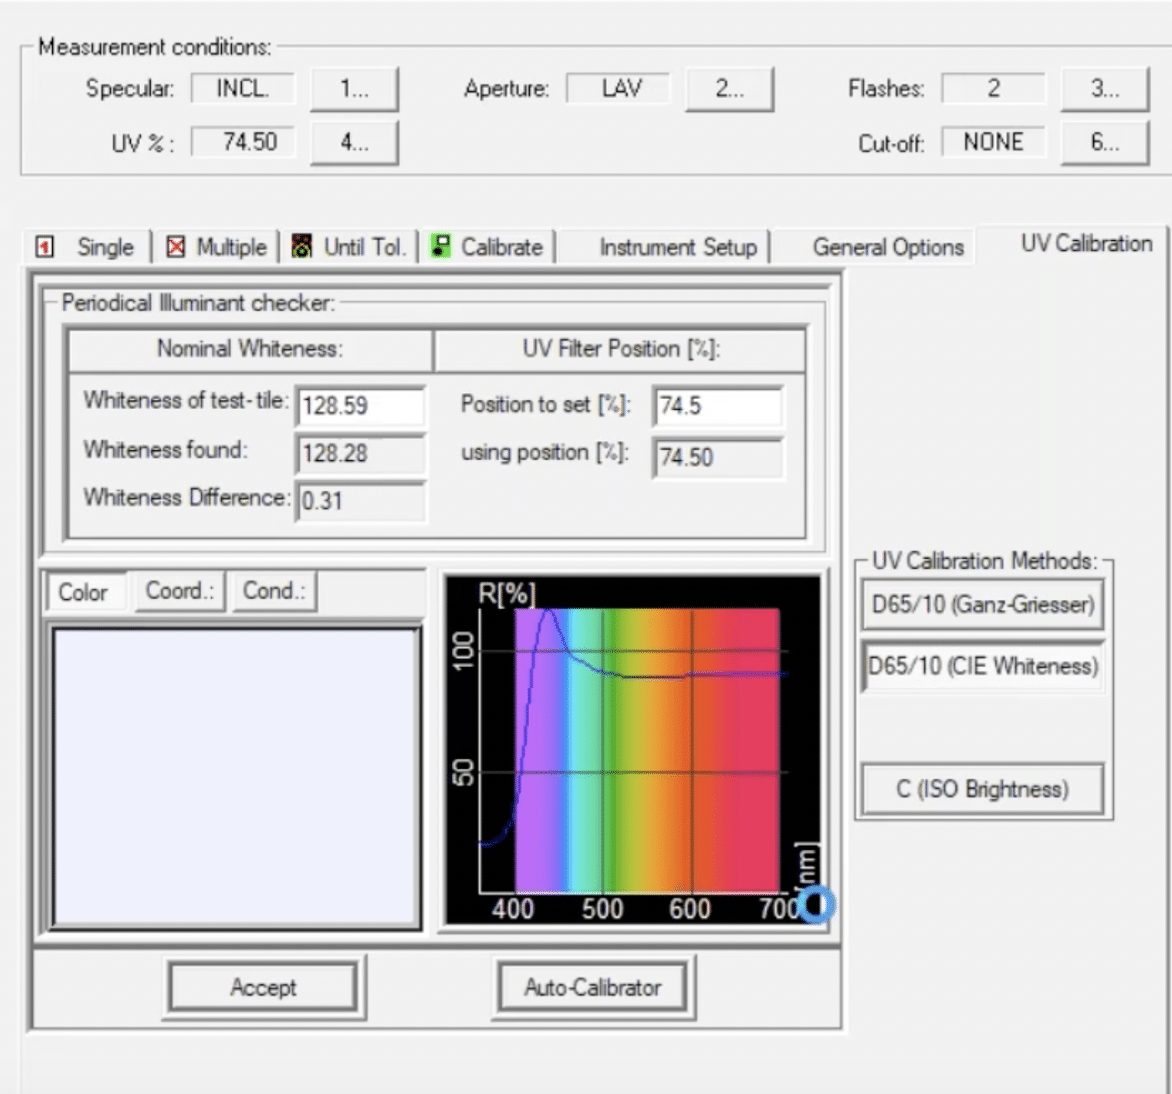
For a new Datacolor spectrophotometer, the UV filter setting typically falls between 60% and 80%.
As the instrument gets older, this percentage slowly increases.
Once the UV filter approaches approximately 90%, it is generally recommended to contact Datacolor to evaluate the instrument and determine whether maintenance or servicing is required.
Eventually, even with the UV filter fully open, the instrument may no longer produce sufficient UV energy to achieve accurate fluorescent white measurements.
Regular servicing helps maintain:
- Measurement accuracy
- Repeatability
- Inter-instrument agreement
- Reliable supplier communication
Related reading: When to Trade in Your Spectrophotometer and Why It Matters.
Why Sphere Condition Matters
Another often-overlooked factor is the condition of the integrating sphere inside the spectrophotometer.
Over years of use, the highly reflective coating inside the sphere can begin to discolor.
This discoloration may result from:
- Normal aging
- Dust accumulation
- Airborne contaminants
- Production environments
- General wear
For standard color measurements, normal calibration can compensate for much of this aging.
However, fluorescent white materials are especially sensitive to changes in UV performance.
If two facilities report noticeably different tint values despite following the same procedures, the condition of each instrument’s integrating sphere should be investigated.
Depending on the inspection results, the sphere may need to be:
- Recoated
- Replaced
- Serviced
Maintaining modern, well-calibrated instruments throughout the supply chain is one of the most effective ways to improve measurement consistency.
Working with Suppliers on Fluorescent White Programs
Once acceptable tolerances for whiteness and tint have been established, suppliers can begin evaluating samples using UV-calibrated spectrophotometers.
This approach creates a far more efficient approval process than relying primarily on visual assessment.
Instead of shipping multiple rounds of samples for review, suppliers can determine whether a sample meets the customer’s requirements before submission.
This allows manufacturers to:
- Reduce unnecessary sample submissions
- Shorten approval cycles
- Minimize production delays
- Improve supplier confidence
- Reduce overall costs
Successful fluorescent white programs typically combine:
- Standardized measurement procedures
- UV-calibrated instruments
- Clearly defined numerical tolerances
- Consistent communication across the supply chain
Related reading:
What If a Sample Still Looks Too Dull?
Some organizations eventually encounter an interesting situation.
A sample may pass both the established Whiteness Index and Tint tolerances, yet still appear visually darker than the approved standard.
This happens because whiteness formulas focus primarily on the blue portion of the reflectance curve generated by optical brightening agents.
Overall brightness differences may therefore not be fully reflected by the whiteness index alone.
Using CMC DL as an Additional Metric
In these situations, some manufacturers include an additional evaluation metric: CMC DL.
CMC DL specifically measures differences in lightness and darkness between two samples.
It can help identify situations where:
- The whiteness index is acceptable.
- The tint value is acceptable.
- The sample still appears noticeably darker than the approved standard.
By combining Whiteness Index, Tint and CMC DL, organizations often achieve better agreement between numerical measurements and visual assessments.
Why DEcmc Is Not Recommended
Although DEcmc is widely used for many color applications, it was not specifically designed for fluorescent white materials.
Because it does not fully account for the influence of optical brightening agents, it may not accurately predict perceived differences between fluorescent white samples.
For this reason, many color professionals rely on Whiteness Index, Tint and CMC DL instead of DEcmc when evaluating optically brightened materials.
Can You Evaluate Fluorescent Whites on a Monitor?
Unfortunately, no.
Although modern monitors offer excellent color reproduction, they cannot accurately display fluorescent colors or reproduce the effects of optical brightening agents (OBAs).
Unlike physical materials, monitors generate color using red, green and blue (RGB) light. They cannot emit the additional visible blue light created when OBAs convert ultraviolet energy into fluorescence.
As a result, fluorescent white materials often appear:
- Less bright than they do in reality
- Slightly blue instead of bright white
- Different from their physical appearance under daylight
- Inconsistent across different monitors
For this reason, digital images and on-screen previews should never be used as the primary method for approving fluorescent white materials.
Instead, organizations should rely on:
- Controlled visual evaluation in standardized light booths
- UV-calibrated spectrophotometers
- Objective numerical color data
These methods provide the consistency required for global color communication and supplier collaboration.
Creating a Repeatable Approval Process for Fluorescent Whites
Successfully managing fluorescent white materials requires much more than simply measuring color.
Organizations need standardized procedures that ensure every facility, supplier and laboratory evaluates materials in exactly the same way.
A repeatable fluorescent white workflow should include:
- Controlled lighting with verified UV content
- UV-calibrated spectrophotometers
- Regular instrument maintenance and servicing
- Standardized operating procedures
- Defined whiteness and tint tolerances
- Consistent supplier communication
When these elements are combined, organizations can achieve:
- More repeatable measurements
- Faster color approvals
- Reduced rework
- Improved supplier alignment
- Lower production costs
- Higher overall product quality
Rather than relying solely on subjective visual evaluations, manufacturers can make color decisions based on objective, traceable data.
This approach significantly improves consistency throughout global supply chains.
Frequently Asked Questions About Fluorescent White Materials
What is a fluorescent white material?
A fluorescent white material contains optical brightening agents (OBAs) that absorb invisible ultraviolet (UV) light and re-emit it as visible blue light, making the material appear brighter and whiter.
What are optical brightening agents (OBAs)?
Optical brightening agents are chemical additives used in textiles, paper and other materials to reduce the appearance of yellowing by converting UV energy into visible blue light.
Why do fluorescent whites look different under different lighting?
The amount of UV energy varies between light sources. Since OBAs rely on UV light to produce their whitening effect, changes in lighting can significantly alter the appearance of fluorescent white materials.
Why is UV calibration important?
Without UV calibration, spectrophotometers may measure fluorescent whites differently because their UV light output varies. Proper calibration ensures accurate and repeatable measurements across different instruments.
What is the TUVCS?
The AATCC Textile UV Calibration Standard (TUVCS) is a certified reference material used to calibrate the ultraviolet content of spectrophotometers when measuring optically brightened textiles.
What is a Whiteness Index?
A Whiteness Index (WI) converts spectral reflectance data into a numerical value representing how white a material appears. Higher values generally indicate a brighter, cleaner white appearance.
Can fluorescent whites be evaluated on a computer monitor?
No. Monitors cannot accurately reproduce fluorescent effects because they do not emit ultraviolet light or replicate the behavior of optical brightening agents.
How often should spectrophotometers be serviced?
Regular maintenance is essential. As xenon lamps, UV filters and integrating spheres age, measurement accuracy may decline. Periodic servicing helps maintain reliable and repeatable results.
Which industries commonly use fluorescent white materials?
Fluorescent whites are widely used in textiles, apparel, paper manufacturing, home furnishings, nonwoven materials and many consumer products where a bright white appearance is desired.
How can Datacolor help?
Datacolor provides spectrophotometers, light booths, software and color management solutions that help manufacturers accurately measure, evaluate and communicate fluorescent white materials throughout the supply chain.
Achieve Consistent Measurements for Fluorescent White Materials
Evaluating fluorescent white materials requires more than visual inspection. With Datacolor’s UV-calibrated spectrophotometers, standardized light booths and color management software, manufacturers can improve measurement accuracy, reduce supplier disputes and create repeatable color approval workflows.
Explore Datacolor Color Management Solutions